Rust holes on a car are not just unsightly; they can lead to more serious structural damage if left untreated. Properly addressing rust is essential to maintaining the integrity of your vehicle’s body and prolonging its lifespan. One of the most cost-effective methods for patching small rust holes is to tape them using specialized products designed for this purpose. In this guide, we’ll walk you through the steps of taping a rust hole on a car and provide tips to ensure a successful repair.
Why Tape a Rust Hole?

Rust holes can form when the paint on the vehicle’s surface is compromised, allowing moisture to penetrate the metal beneath. If not addressed, rust can spread and corrode the metal, leading to weakened areas and structural instability. Taping a rust hole is a temporary solution that can prevent further deterioration while buying time for a more permanent repair. This method is especially useful for smaller, non-structural rust damage, and when immediate repairs aren’t feasible.
Tools and Materials Needed
Before starting the rust hole taping process, you’ll need to gather some essential tools and materials. Below is a comprehensive list:
| Tool/Material | Purpose |
|---|---|
| Sandpaper (fine grit) | To smooth and clean the rusted area |
| Rust Converter | To stop rust and prevent further corrosion |
| Automotive-Grade Body Filler | For patching the rust hole |
| Putty Knife | To apply the body filler |
| Self-Adhesive Rust Tape | To seal and tape the rust hole |
| Clean Cloth or Sponge | For wiping and cleaning the area |
| Masking Tape | To mask off surrounding areas |
| Primer | To ensure good adhesion for paint |
| Car Paint | For finishing touch and color matching |
Steps to Tape a Rust Hole on a Car
Step 1: Prepare the Area
The first step in taping a rust hole is preparing the area. This involves removing any loose paint, rust, or debris around the hole. Begin by using sandpaper (fine grit) to gently sand the affected area. The goal is to smooth the surface and remove as much rust as possible.
- Sand the Rusted Area: Sand in a circular motion to ensure all loose material is removed.
- Clean the Surface: Use a clean cloth or sponge to wipe away any dust or debris created during sanding.
Step 2: Apply Rust Converter
Once the area is clean and smooth, apply a rust converter. Rust converters work by chemically bonding with the rust, turning it into a stable, paintable surface. Apply a generous amount of rust converter to the rust hole and surrounding areas. Let it dry completely as per the product’s instructions.
Step 3: Apply Body Filler
After the rust converter has dried, apply automotive-grade body filler to fill the hole. Use a putty knife to spread the filler smoothly and ensure even coverage. Allow the filler to cure as per the recommended time. Once cured, gently sand the area again to ensure a smooth, level surface.
Step 4: Tape the Rust Hole
Now that the filler is smooth and dry, it’s time to tape the rust hole. Use self-adhesive rust tape for this step. This tape is specifically designed to seal off and protect rusted areas from further exposure to moisture. Peel off the backing of the rust tape and carefully press it onto the patched area, ensuring full coverage of the rust hole.
Step 5: Primer and Paint
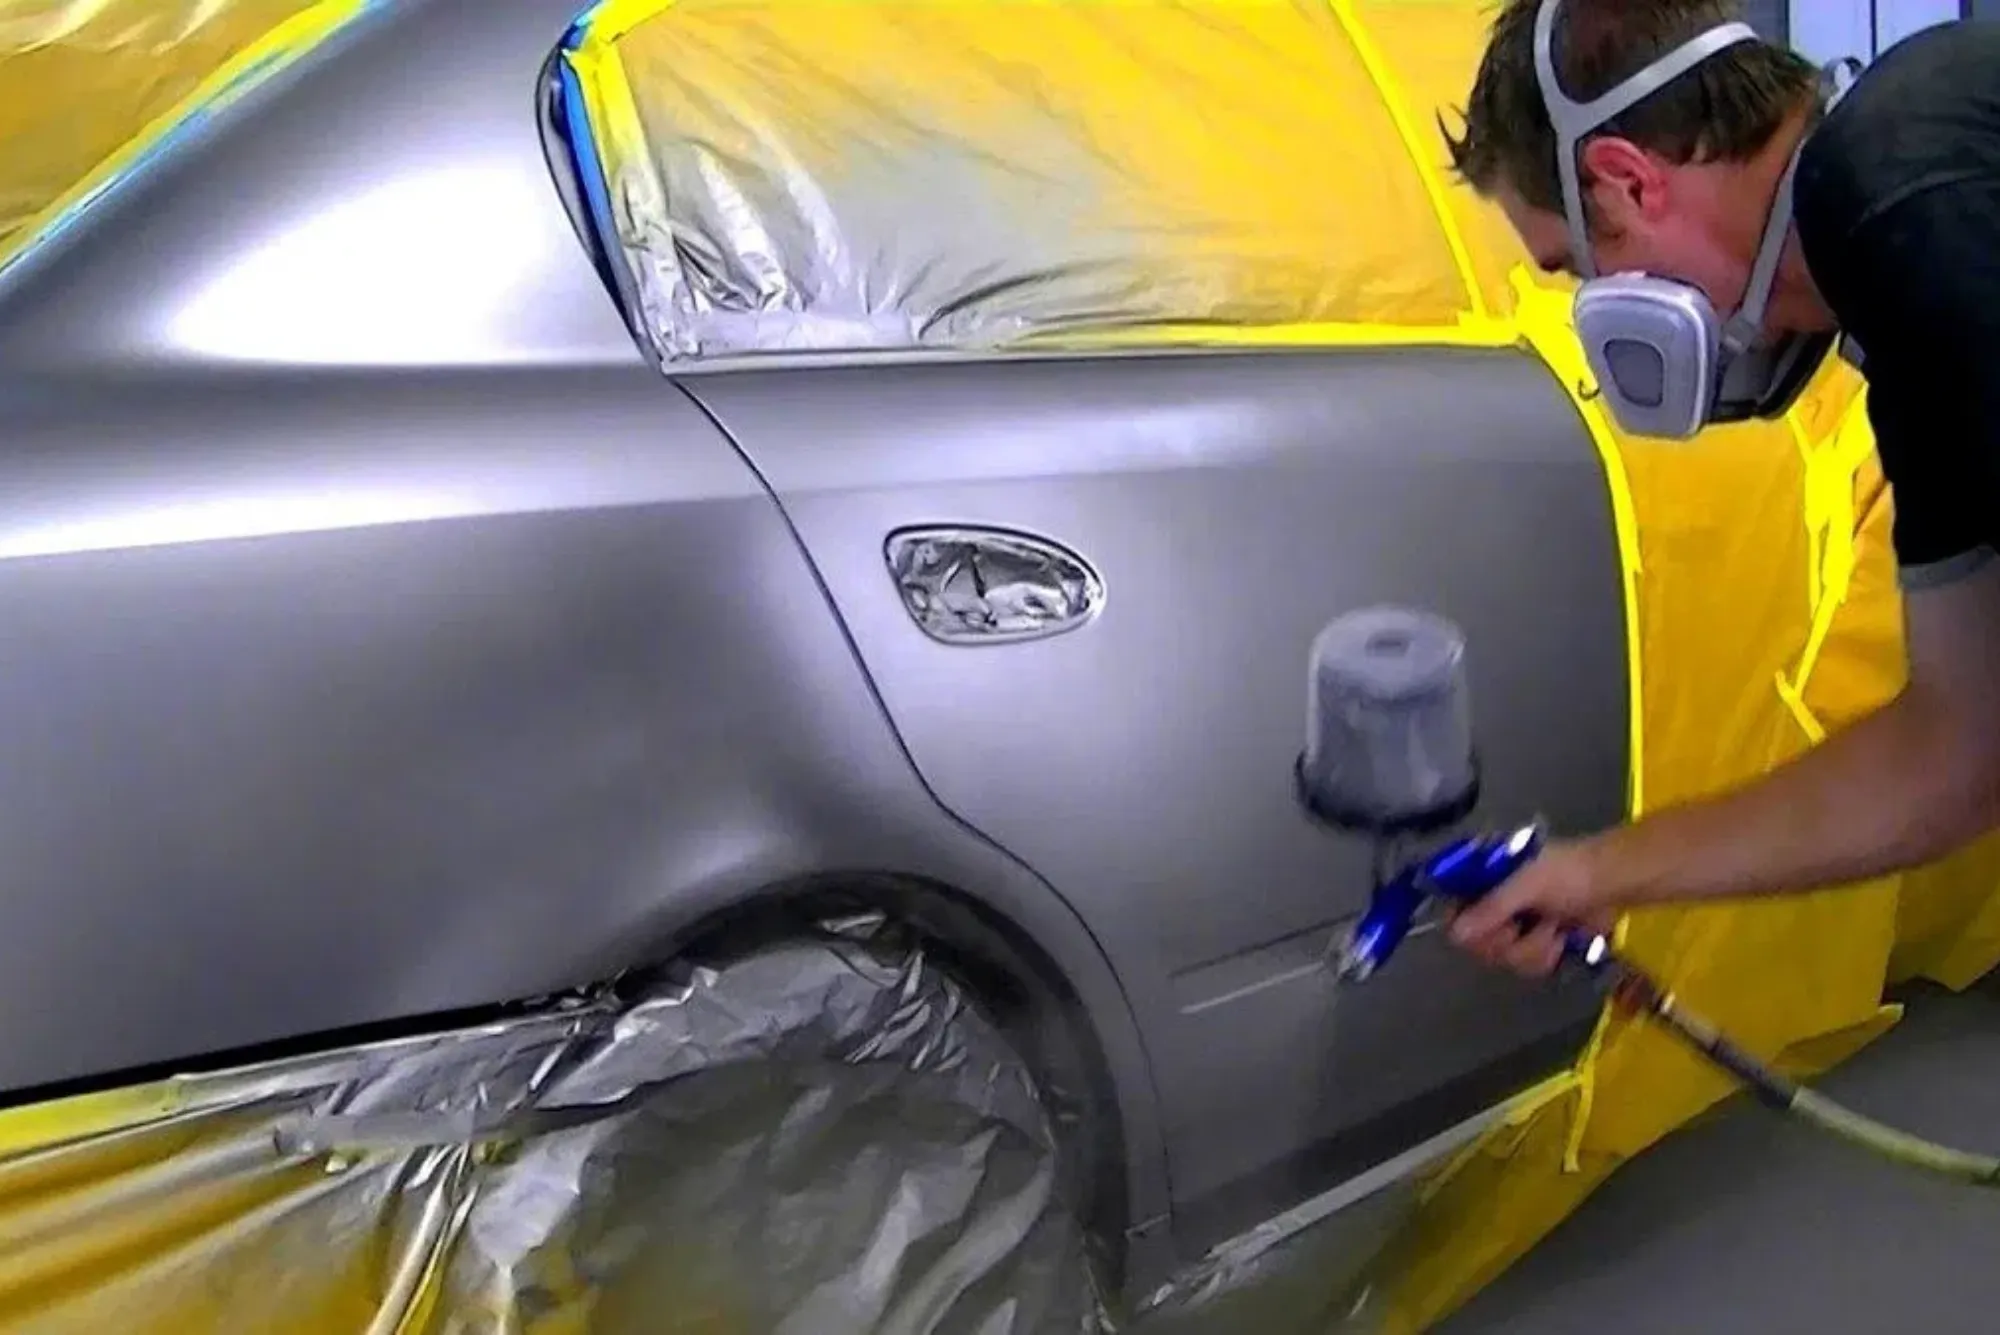
To complete the repair, apply primer to the patched area. Primer helps the paint adhere better and creates a protective layer against further rusting. Once the primer has dried, apply automotive paint that matches the vehicle’s color. This step provides a seamless finish that looks professional.
Tape a Rust Hole: Step-by-Step Guide
Tape a Rust Hole is a crucial step in addressing minor rust damage on a vehicle. This process involves cleaning, prepping, and sealing the rusted area with self-adhesive rust tape. By effectively sealing the rust hole, it prevents moisture from seeping in and causing further corrosion. Using high-quality materials such as rust converters, body filler, and specialized tape ensures a durable and long-lasting repair. Whether for a temporary fix or a cost-effective solution before a more permanent repair, taping a rust hol provides essential protection against rust expansion.
Tips for a Successful Rust Hole Repair
- Work in a Well-Ventilated Area: Ensure proper ventilation when working with rust converters, fillers, and paints.
- Use Safety Gear: Wear gloves, safety goggles, and a mask to protect yourself from harmful chemicals.
- Allow Adequate Drying Time: Proper curing times are crucial for achieving a durable and long-lasting repair.
- Inspect Regularly: Even after taping the rust hole, it’s important to periodically check the area for signs of corrosion or peeling tape.
Advantages of Taping Rust Holes
- Cost-Effective: Taping rust holes can be a budget-friendly solution compared to full-body repairs.
- Temporary Solution: It provides a temporary fix until a more permanent repair can be made.
- Ease of Application: With the right tools and materials, even DIYers can perform this repair successfully.
Customer Reviews for Taping Rust Hol holes
Here are some real customer reviews regarding their experiences with taping rust holes on their vehicles:
John D. – “A Simple Solution for Small Rust Holes”
Rating: ★★★★☆
“I had a small rust hole on my car near the wheel well. After following the steps in a tutorial, I used self-adhesive rust tape to seal it. It’s been a few months, and so far, the tape has held up well. Definitely recommend this as a quick fix for minor rust issues.”
Sarah T. – “Affordable Way to Keep Rust at Bay”
Rating: ★★★☆☆
“I tried taping a rust hole on my car after seeing some DIY videos online. The process wasn’t too complicated, but I noticed some bubbling after a few weeks. It worked for a while, but I think a professional touch might be needed for long-term results.”
Mark R. – “Worked Great, but Surface Prep is Key”
Rating: ★★★★☆
“I used rust converter, body filler, and then self-adhesive rust tape on a larger rust hole. The finished result looks decent, but I spent a lot of time prepping the surface. The key is proper sanding and cleaning to ensure a smooth surface before taping.”
Laura P. – “Saved Me a Trip to the Body Shop”
Rating: ★★★★★
“Love this solution! My rust hole was located on the roof of my SUV, which would’ve cost a lot at a repair shop. Following the step-by-step guide worked wonders, and I couldn’t be happier with how my car looks now. The tape has held up well through rain and car washes!”
Tom W. – “A Temporary Fix That Worked”
Rating: ★★★☆☆
“I used self-adhesive rust tape for a rust hole near the door. While it worked for a few months, I noticed some wear and tear as the seasons changed. It’s a good temporary fix, but I plan to get it professionally repaired eventually.”
Maria L. – “Great for Small Repairs, Not for Heavy Corrosion”
Rating: ★★★★☆
“I had multiple small rust holes on my car, and taping each one helped prevent further damage. It’s been a few months, and no issues yet. However, larger rust patches require a more thorough fix, but for smaller areas, this works well.”